- 1- Measuring Moldings Precisely Before Cutting
- 2- Understanding How to Use a Miter Saw for Moldings
- 3- Cutting Techniques for Perfect Angles
- 4- Common Mistakes and Expert Advice
- 5- Real Case Experience: A Home Renovation Story
- 6- Finding the Right Tools for Your Molding Projects
1. Measuring Moldings Precisely Before Cutting
Before you even think about cutting, mastering how to measure moldings accurately is the foundation of a flawless installation. Moldings are often installed in corners, which means your measurements must account for precise angles and lengths. Start by determining the length of the wall or the surface where the molding will be installed. Use a quality tape measure and mark your measurements clearly on the molding piece.
One key detail is to measure twice, a mantra every craftsman lives by. Not only should you measure the length, but you should also understand the angle where two moldings meet, especially for inside or outside corners. Using an angle finder or a protractor can help ensure your cuts fit perfectly. For example, most corners are 90 degrees, but walls can be uneven, so taking precise angle measurements will prevent gaps after installation.
Additionally, consider the molding’s profile and thickness, which can affect the cutting technique. For longer molding runs, mark your cutting points carefully and make sure you’re consistent with measurement units — inches or centimeters — to avoid errors.
2. Understanding How to Use a Miter Saw for Moldings
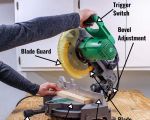
The miter saw is an essential tool for cutting moldings with accuracy and efficiency. Learning how to operate it correctly will save you time and improve your results. Begin by ensuring your miter saw is set up on a stable surface and that the blade is sharp. A dull blade can cause splintering or rough edges, which undermine the clean look of your molding.
Familiarize yourself with the saw’s adjustable features — the angle gauge and the bevel adjustment. These controls allow you to set precise angles for miter cuts (side-to-side) and bevel cuts (tilting the blade). For typical crown molding, you may need compound cuts that combine both angles, so understanding how to adjust the saw is critical.
When placing the molding on the saw, position it with the back flat against the fence and the bottom resting on the base. This orientation replicates how the molding sits on the wall and ceiling, ensuring your cuts fit perfectly when installed. Holding the molding firmly in place while cutting is vital to avoid movement, which can ruin an otherwise perfect cut.
3. Cutting Techniques for Perfect Angles
Cutting moldings with a miter saw requires more than just setting the right angle; it demands attention to detail and methodical practice. When making miter cuts, always double-check your angle settings before cutting. Use scrap pieces to test your cuts first, so you don’t risk damaging your actual molding.
For inside corners, where two moldings meet at a 90-degree angle, each piece is typically cut at 45 degrees. However, if your walls are not perfectly square, slight angle adjustments are needed. A useful trick is to cut one side slightly longer and make fine adjustments by sanding or trimming until the joint fits tightly.
Outside corners require complementary angles that meet neatly without gaps. When cutting crown molding, remember it sits at an angle on the wall, so you may need compound miter cuts — this is where both the miter and bevel settings are combined. Taking your time to understand these angles can transform your project from amateur to professional-grade.
4. Common Mistakes and Expert Advice
Many beginners make the mistake of rushing the measuring and cutting process. A common error is failing to consider the molding’s orientation on the saw, which leads to reversed cuts that don’t fit the corners. Always label your molding pieces and practice the “dry fit” technique before final installation.
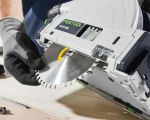
Another frequent mistake is neglecting blade maintenance. Dull blades not only produce rough cuts but also pose safety hazards. Regularly inspect and replace your blade to maintain clean, precise cuts. Also, when cutting thin moldings, be cautious of splintering by cutting slowly and using a fine-tooth blade designed for finish work.
Expert advice: If you’re new to using a miter saw, invest time in watching tutorials or seeking hands-on advice. Practice on scrap pieces and keep your workspace organized to reduce errors and accidents.
5. Real Case Experience: A Home Renovation Story
Recently, a friend of mine decided to install crown molding throughout her living room to add a touch of elegance. Despite having no prior experience, she carefully measured each wall, noting the angles with a digital angle finder. Using a miter saw, she practiced multiple cuts on scrap wood to get comfortable with setting angles and positioning moldings.
What made her project stand out was her patience and methodical approach. When she encountered an uneven corner, she didn’t rush the cut; instead, she measured again and made small bevel adjustments on the saw. This attention to detail ensured the moldings fit seamlessly, impressing everyone who visited her home.
If you want similar success, don’t hesitate to equip yourself with the right tools and knowledge. For the best selection of miter saws and quality moldings, ToolNest offers a wide range of products and expert recommendations that can help you achieve professional results with ease.
6. Finding the Right Tools for Your Molding Projects
Choosing the proper tools can make or break your molding installation project. Aside from a reliable miter saw, consider investing in measuring tools like a tape measure with a locking feature, a digital angle finder, and a sturdy workbench or saw stand. These tools enhance accuracy and safety.
At ToolNest, you can find top-quality miter saws tailored to different skill levels and project sizes. Whether you’re a DIY enthusiast or a professional carpenter, they provide tools and accessories that match your specific needs, along with helpful guides and customer support.
Remember, precise measurement combined with skillful cutting is the key to flawless moldings. Taking the time to understand your tools and practicing your cuts will elevate your home improvement projects significantly.


