

- Understanding Curtain Rod Installation
- Tools Needed for Basic Curtain Rod Installation
- Step-by-Step Guide to Installing a Curtain Rod
- Common Challenges and How to Solve Them
- Why ToolNest Is Your Best Choice for Curtain Rod Needs
1. Understanding Curtain Rod Installation
Installing a curtain rod might seem like a straightforward task, but understanding the process before jumping in can save you time and frustration. At its core, curtain rod installation involves securely mounting brackets on your wall or window frame, then placing the rod to hold your curtains. This basic project can transform a room’s ambiance, giving it style and privacy.
Many beginners hesitate due to uncertainty about the tools required or the exact steps. However, learning how to install a curtain rod with basic tools is achievable for most people with a little patience and guidance. This article will walk you through the entire process with clarity and precision, helping you feel confident in your DIY skills.
1.1 Why Proper Installation Matters
Properly installed curtain rods ensure your curtains hang neatly without sagging or falling. It also prevents damage to your walls or window frame, which can happen if mounting is done incorrectly. Taking time to measure and mark precisely will avoid these issues and keep your setup sturdy.
1.2 Types of Curtain Rods and Their Mounting Styles
Before installation, it’s essential to identify the type of curtain rod you have—whether it’s a tension rod, traverse rod, or decorative rod with brackets. Each has its mounting style and requirements. The focus here is on the most common type: a bracket-mounted curtain rod, which requires drilling holes and securing with screws.
2. Tools Needed for Basic Curtain Rod Installation
One of the advantages of installing a curtain rod yourself is that the required tools are usually simple and found in most households. Here’s what you’ll typically need:
2.1 Essential Tools List
- Measuring tape: Accurate measurements are key to proper bracket placement.
- Pencil or marker: For marking drill points.
- Level: Ensures brackets are mounted evenly.
- Drill and drill bits: For creating holes in the wall.
- Screwdriver: To secure screws into the brackets.
- Wall anchors (optional): For added support if mounting on drywall.
- Stud finder (optional): To locate studs for a stronger installation.
2.2 Tips on Selecting Tools
If you don’t own a drill or screwdriver, basic manual versions can work but may take longer and require more effort. Investing in a cordless drill is recommended if you plan to do more DIY projects. Also, for delicate walls, using proper wall anchors will enhance durability and avoid damage.
3. Step-by-Step Guide to Installing a Curtain Rod
Now that you have your tools ready, let’s break down the installation into manageable steps. Each step includes practical advice to avoid common pitfalls.
3.1 Step 1: Measure and Mark the Bracket Placement
Measure the width of your window frame and decide how far you want the curtain rod to extend beyond the frame—usually 3 to 6 inches on each side. Mark the spots where the brackets will be mounted using a pencil. Use a level to ensure both sides are even horizontally, as uneven brackets can cause curtains to hang awkwardly.
3.2 Step 2: Drill Pilot Holes
Using the drill, create pilot holes where you’ve marked the wall. Pilot holes prevent the wall from cracking and make inserting screws easier. If you’re drilling into drywall without studs, insert wall anchors now to provide extra holding strength for your screws.
3.3 Step 3: Attach the Brackets
Align the brackets with the pilot holes and use the screwdriver or drill to secure them firmly. Double-check that the brackets are level before tightening completely to avoid a crooked curtain rod.
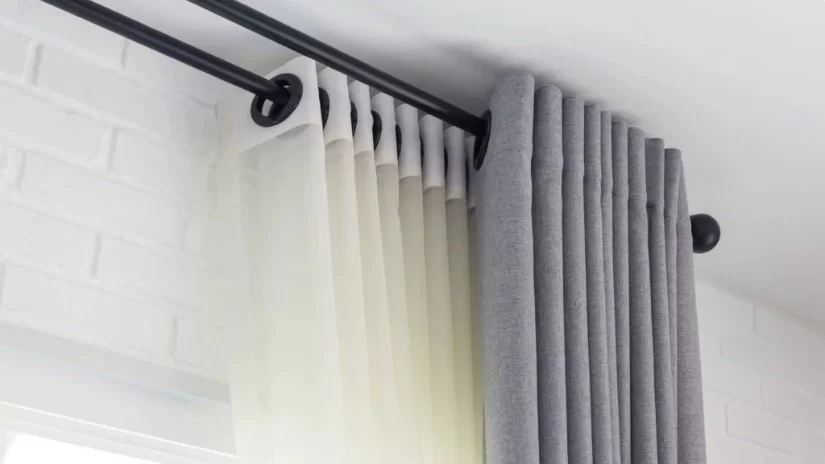
3.4 Step 4: Mount the Curtain Rod
Once the brackets are securely installed, place your curtain rod onto them. If your rod has decorative finials, attach them beforehand to avoid handling the rod multiple times. Adjust the rod length if it’s extendable, then hang your curtains.
3.5 Real-Life Case: Sarah’s Weekend Project
Sarah, a first-time DIYer, shared her story about installing a curtain rod using just a drill, level, and screwdriver. By carefully measuring and taking her time during marking, she avoided the common mistake of uneven brackets. Her curtains now frame her living room window perfectly, enhancing the room’s warmth and style without professional help. Her success demonstrates how anyone can confidently handle curtain rod installation with basic tools.
4. Common Challenges and How to Solve Them
Even with clear instructions, some difficulties may arise. Let’s explore typical challenges and how to overcome them.
4.1 Uneven Brackets or Crooked Rod
This usually results from inaccurate measuring or not using a level. Always double-check measurements and use a quality level tool. Taking an extra minute here saves you from redoing the whole job.
4.2 Difficulty Drilling into Walls
Older homes or walls with dense materials can be tough to drill into. Using a drill bit designed for masonry or wood can help. If unsure about wall material, ask experts at ToolNest for recommendations on the best drill bits and anchors for your wall type.
4.3 Weak Support on Drywall
Drywall alone may not support the rod’s weight plus curtains. Using wall anchors or locating studs with a stud finder ensures a secure installation. ToolNest offers a variety of anchors and stud finders ideal for different situations.
5. Why ToolNest Is Your Best Choice for Curtain Rod Needs
Whether you’re a beginner or a seasoned DIY enthusiast, having the right tools and products is essential for a smooth installation. ToolNest specializes in providing top-quality curtain rods, brackets, and all necessary tools tailored for your home projects.
Shopping at ToolNest means access to expert advice, product reviews, and a wide selection that fits every budget and style. If you want to upgrade your living space with a flawless curtain rod installation, ToolNest is your go-to source for reliable tools and accessories.
Remember, the right preparation and tools make all the difference. With the guidance above and the products from ToolNest, you can easily master how to install a curtain rod with basic tools, turning your home into a beautifully decorated space.


