Introduction to Painter’s Tape
Whether you are a DIY enthusiast or a seasoned professional, painter’s tape is one of the most essential tools for achieving neat and clean lines during painting projects. I have often found myself reaching for painter's tape whenever I am looking to create sharp boundaries or protect certain areas from paint splatters. It's incredibly versatile and useful for both small home projects and large renovations. In this guide, I’ll show you how to use painter’s tape like a pro and make your painting projects easier and more efficient.
1. Choose the Right Painter’s Tape
The first step in achieving crisp, professional results with painter’s tape is selecting the right type of tape. Not all painter’s tapes are created equal. When choosing painter’s tape, you’ll want to consider the type of surface you're working with and the kind of paint you are using. For instance, if you're working with delicate surfaces like freshly painted walls or wallpaper, you’ll need a low-tack tape that won’t peel off the paint underneath. On the other hand, if you're working on rough surfaces like textured walls or wood, you may want a stronger tape for better adhesion.
2. Preparing the Surface
Before you start taping, it’s important to properly prepare the surface to ensure the tape adheres well and provides the best results. Clean the area where you plan to apply the tape to remove any dust, dirt, or oils. This will ensure a stronger bond between the tape and the surface. I always take a moment to wipe down the surface with a damp cloth and allow it to dry before starting. If you're taping around a trim or baseboard, make sure the area is smooth and free from peeling paint or debris.
3. Applying the Tape with Precision
Now comes the fun part: applying the painter’s tape. I always make sure to apply the tape with precision, as this is the key to achieving those clean, crisp lines. When you place the tape on the surface, press it down firmly using your fingers or a tool like a plastic smoother. It’s essential to avoid any wrinkles or air bubbles, as they can cause paint to bleed underneath the tape. I also make sure the tape is flush with the surface, ensuring a tight seal along the edges.
4. Use a Putty Knife for Extra Precision
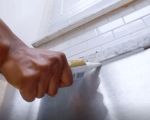
For those of you who want to take it a step further, I recommend using a putty knife to press down the tape along the edges. This ensures a more even and firm adhesion, preventing the paint from creeping under the tape. I learned this trick during a professional painting project, and it has made a huge difference in the final result. If you’re painting near corners or intricate edges, a putty knife is your best friend for a sharp line.
5. Painting Over the Tape
Once your painter's tape is applied, it's time to start painting. But before you go ahead and start slapping paint on, I’ve learned a valuable tip: seal the edge of the tape with a light coat of the base color before using your new color. By painting over the edge of the tape with the same color as the wall or surface underneath, you’ll create a seal that prevents the new color from bleeding under the tape. This technique is especially helpful when painting over light-colored walls with darker shades.
6. Removing the Tape for Clean Lines
One of the most rewarding parts of the job is removing the painter’s tape. After you've finished painting, wait for the paint to dry slightly, but not completely. I always make sure to remove the tape while the paint is still slightly tacky. This helps avoid peeling off dried paint with the tape. Gently pull the tape back at a 45-degree angle, ensuring you pull slowly and steadily to keep the lines as clean as possible. If you do this correctly, you'll be left with flawless lines that look like a pro did it!
7. Common Mistakes to Avoid
Even with the best preparation, mistakes can happen. Here are a few common pitfalls I’ve encountered that you should watch out for:
- Using the wrong type of tape: Make sure to match your tape to the project’s surface and paint type. Using the wrong tape can cause the paint to bleed or the tape to peel off the paint underneath.
- Not pressing the tape down firmly: Always ensure the tape is tightly sealed against the surface to avoid paint seepage.
- Removing the tape too early: Don’t rush! Wait until the paint has dried to a point where it won’t smear, but is still soft enough to prevent peeling.
- Reusing painter’s tape: Tape loses its adhesion after multiple uses. Always use fresh tape for the best results.
8. Final Thoughts on Painter’s Tape
Using painter’s tape properly can really make a difference in the quality of your painting projects. Whether you're working on a DIY home improvement or a professional painting job, following these steps will help you get crisp, clean lines every time. I’ve learned through experience that taking a little extra time with preparation, application, and removal can result in a much more polished finish. So go ahead, grab that tape, and get started on your next masterpiece!


