- 1-Understanding-Drywall-Damage
- 2-Essential-Tools-For-Drywall-Repair
- 3-Step-By-Step-Drywall-Repair-Process
- 4-Common-Mistakes-To-Avoid
- 5-Real-Life-Experience-And-Case-Studies
- 6-Where-To-Find-The-Best-Drywall-Tools
1. Understanding Drywall Damage
Drywall damage can range from small dents and holes to large cracks or water damage. Understanding the type and extent of damage is crucial before beginning any repair. Common causes include accidental impacts, settling of the building, or moisture exposure.
Knowing the damage type helps determine the necessary repair approach and tools, ensuring a lasting fix rather than a temporary patch.
1.1 Types of Drywall Damage
Typical issues include nail pops, small holes from doorknobs, cracks along seams, and larger punctures. Each requires different repair techniques, which we’ll cover in the following sections.
2. Essential Tools for Drywall Repair
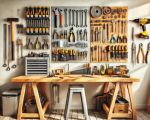
Knowing how to repair damaged drywall with tools begins with having the right equipment. Key tools include:
- Putty knife or drywall knife for applying joint compound
- Drywall saw or utility knife to cut damaged sections
- Sandpaper or sanding block to smooth patched areas
- Drywall tape to reinforce seams
- Joint compound or spackle for filling holes
- Primer and paint to finish the repair
Having these tools at hand makes the process smoother and ensures professional results.
3. Step-by-Step Drywall Repair Process
3.1 Preparing the Damaged Area
Begin by cleaning the damaged area and removing any loose debris. For larger holes, use a drywall saw to create a clean, square cut around the damage.
3.2 Applying Drywall Patch and Tape
For holes, place a drywall patch or cut a new piece of drywall to fit the opening. Secure it with drywall tape around the edges to prevent cracking.
3.3 Applying Joint Compound
Use a putty knife to apply a thin layer of joint compound over the patch and tape, feathering the edges to blend with the existing wall. Allow it to dry completely.
3.4 Sanding and Finishing
Sand the dried compound smooth and apply additional coats as needed, sanding between each. Once the surface is flush and smooth, prime and paint to match the surrounding wall.
4. Common Mistakes to Avoid
Many DIYers rush through drying times or skip sanding steps, resulting in uneven finishes or visible patches. Another common error is not properly securing patches, leading to cracks or bulges later on.
Patience and attention to detail are essential for a flawless drywall repair.
5. Real-Life Experience and Case Studies
John, a homeowner from Ohio, shared how learning how to repair damaged drywall with tools saved him significant costs during a home renovation. By following a structured repair process and using quality tools, he restored his living room walls to a professional standard.
Similarly, contractor Maria emphasizes the importance of tool choice and preparation. “Many small repairs become big headaches when done hastily,” she notes. “Using the right tools from ToolNest can make all the difference.”
6. Where to Find the Best Drywall Tools
For those ready to tackle drywall repairs, ToolNest offers a curated selection of high-quality tools designed for both DIYers and professionals. Whether you need putty knives, drywall saws, or sanding accessories, ToolNest has reliable products that ensure your repair projects succeed.

