- 1-Preparing-for-Wallpaper-Removal
- 2-Essential-Hand-Tools-for-Removing-Wallpaper
- 3-Step-by-Step-Manual-Wallpaper-Removal-Techniques
- 4-Tips-for-Effective-and-Safe-Wallpaper-Removal
- 5-Dealing-with-Stubborn-Wallpaper-and-Adhesive
- 6-Post-Removal-Wall-Preparation-and-Cleanup
Preparing for Wallpaper Removal
Before diving into how to remove wallpaper with hand tools, thorough preparation is key. Start by clearing the room of furniture or covering it with plastic sheets to protect from debris. Protect your floors as well with drop cloths or newspapers. It's important to turn off power to the room and cover electrical outlets to ensure safety during the process.
Next, examine the type of wallpaper and wall surface to determine the best approach. Some wallpapers are painted over or have multiple layers, which can affect removal difficulty. Taking time to plan ensures fewer surprises and better results once you begin manual scraping and peeling.
Essential Hand Tools for Removing Wallpaper
To successfully remove wallpaper using hand tools, you’ll need the right equipment. Common hand tools include a wallpaper scraper or putty knife with a flexible blade, a scoring tool to perforate tough wallpaper, a bucket for water or wallpaper remover solution, and sponges or cloths for cleanup.
A sharp utility knife helps cut through edges or trim wallpaper into manageable sections. Some also prefer a wallpaper removal paddle with a longer handle for better leverage and less strain on hands. Investing in quality tools from trusted suppliers like ToolNest can make the process more efficient and less frustrating.
Step-by-Step Manual Wallpaper Removal Techniques
Manual wallpaper removal typically starts by scoring the wallpaper lightly to allow water or a removal solution to penetrate the adhesive. Use a sponge soaked in warm water or a mild wallpaper removal mixture to saturate the wallpaper evenly. Let it sit for 15 to 20 minutes to soften the glue beneath.
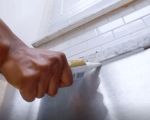
Then, begin carefully peeling or scraping from a corner or seam using the scraper tool. Work slowly to avoid damaging the drywall underneath. Move methodically across the wall, applying more water as needed to keep the wallpaper moist. Patience is vital; rushing can cause damage and more cleanup later.
Tips for Effective and Safe Wallpaper Removal
Manual removal can be physically demanding, so remember to take breaks and stretch your hands and arms to avoid fatigue. Wearing gloves protects your skin from irritation caused by adhesive residue or cleaning solutions.
Keep a spray bottle handy to re-wet stubborn sections. Also, maintain a steady scraping angle to minimize wall damage. Dispose of removed wallpaper properly and clean tools regularly to keep the job tidy. These safety and efficiency tips help ensure a smoother, less stressful wallpaper removal experience.
Dealing with Stubborn Wallpaper and Adhesive
Sometimes, wallpaper refuses to budge or leaves sticky glue behind. For these tougher spots, use additional techniques like applying vinegar and water solution or specialized adhesive removers, allowing longer soaking time.
Gentle sanding after complete drying can remove remaining glue residues. If drywall is damaged during removal, minor repairs with spackle or drywall patch kits will restore a smooth surface for repainting or new wallpaper. Patience and correct hand tool use are critical to overcoming these challenges.
Post-Removal Wall Preparation and Cleanup
Once the wallpaper is off, clean the walls thoroughly with warm soapy water to remove residual adhesive. Inspect for damages such as gouges or tears caused during scraping and repair as needed.
After repairs dry, lightly sand the wall to smooth rough areas before priming and painting or applying new wallpaper. This final preparation step ensures your walls are ready for their next makeover, leaving your space refreshed and beautiful.
For those seeking the best tools and advice on wallpaper removal, ToolNest offers a wide selection of high-quality hand tools and expert guidance. Visit ToolNest to find everything needed for a successful DIY wallpaper removal project.

