Fixing Outdoor Deck Boards Safely: A Comprehensive Guide for DIY Enthusiasts
As someone who enjoys spending time outdoors, I can attest to the importance of having a well-maintained deck. Over the years, I’ve learned that keeping a deck in top condition requires regular repairs and upkeep, especially when it comes to the deck boards. Whether your deck is made of wood or composite materials, fixing outdoor deck boards safely is an essential part of maintaining the beauty and safety of your outdoor space. In this guide, I will share some of the best practices, tools, and techniques I’ve learned to help you repair deck boards effectively, ensuring your deck remains a safe and enjoyable place for years to come.
1. Why Fixing Outdoor Deck Boards is Important
If you’ve noticed some of your outdoor deck boards are cracked, warped, or loose, it’s crucial to address these issues as soon as possible. Deck boards are the foundation of your outdoor living space, and when they become damaged, they pose safety risks. Loose or cracked boards can lead to tripping hazards, while warped boards may cause water to pool on the deck, leading to further damage.
In my own experience, I once ignored a few loose deck boards for too long, and the damage spread, costing me more in repairs than if I had taken care of it earlier. Once I learned the importance of maintaining my deck, I started fixing damaged boards immediately, which not only made my deck safer but also enhanced its aesthetic appeal.
2. Tools and Materials You’ll Need for the Job
Before you start fixing your deck boards, it’s important to gather the necessary tools and materials. Here’s a list of essential items I’ve used for deck repairs:
- Screwdriver or Drill – To remove old screws or nails and to install new fasteners.
- Decking Screws – These screws are specifically designed for outdoor use and provide a secure fit.
- Wood or Composite Deck Boards – Depending on your deck’s material, you’ll need to purchase the appropriate type of replacement boards.
- Measuring Tape – For measuring the length of the boards you need to replace.
- Hammer or Pry Bar – These tools will help you remove old nails or boards that need to be replaced.
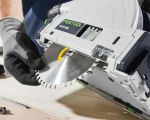
- Power Saw – If you need to cut new boards to size, a saw is essential.
- Level – To ensure your deck boards are aligned properly during installation.
Having the right tools is vital for a successful repair job. When I first started, I used some old, rusted screws, and the results weren’t great. After upgrading my tools, I found that the job went much more smoothly and the results were far more professional-looking.
3. Step-by-Step Guide to Fixing Deck Boards
Now that you have your tools ready, here’s a step-by-step process I follow to fix deck boards safely and effectively:
Step 1: Assess the Damage
Before jumping into repairs, walk around your deck and assess the damage. Look for cracked, warped, or loose boards. Sometimes, the damage may not be obvious, so be sure to test each board’s stability. When I did this step, I was surprised to find more issues than I initially noticed, which required me to replace several boards instead of just one or two.
Step 2: Remove the Damaged Boards
Once you’ve identified the damaged boards, use a screwdriver or drill to remove any screws or nails holding them in place. If the board is severely damaged, use a hammer or pry bar to gently lift it out. Be careful not to damage the surrounding boards while doing this. In one of my projects, I had to remove several layers of boards to reach the problem areas, and I was extra cautious to avoid causing more harm to the rest of the deck.
Step 3: Measure and Cut New Boards
Next, measure the length of the old board and cut your new board to match. If you’re working with wood, ensure the grain pattern matches your existing deck. When I replaced my wood boards, I found that matching the color and texture made a huge difference in the final look of the deck.
Step 4: Install the New Boards
Now, place the new boards in position and secure them with decking screws. Make sure each screw is tightened properly but not over-tightened, as this can cause the wood to crack. I always use a level to ensure that the boards are perfectly aligned with the others.
Step 5: Sand and Finish
After the boards are securely fastened, use sandpaper to smooth out any rough edges. If you’re working with wood, you can apply a wood sealant or deck stain to protect the boards from the elements. When I applied a sealant to my deck, it not only helped protect the wood from moisture but also enhanced its natural color.
4. Safety Precautions to Take
Safety is paramount when working on any home improvement project, especially when handling tools. I always take the following precautions:
- Wear Protective Gear – Always wear gloves and safety glasses to protect your hands and eyes from debris or sharp objects.
- Use Stable Ladders – If you need to work from a height, ensure that your ladder is stable and positioned on a level surface.
- Check for Nails and Screws – Before disposing of old boards, make sure there are no protruding nails or screws that could cause injury.
Following these safety measures has always helped me avoid accidents. For example, during one repair, a screw slipped and almost caused an injury, but I was wearing safety glasses, so I was able to avoid harm.
5. Preventing Future Damage
Once you’ve repaired your deck, it’s important to take steps to prevent future damage. Regular maintenance is key to keeping your deck in top condition. I recommend cleaning your deck regularly and checking for any loose screws or boards. Additionally, applying a weather-resistant sealant can help protect your deck from rain and UV damage.
By being proactive and maintaining my deck regularly, I’ve been able to extend its life significantly, which saves me money in the long run.
With these tips, you’ll be able to fix your outdoor deck boards safely and effectively, ensuring your deck remains a beautiful and safe space for your family and friends to enjoy. Ready to get started on your deck repair? Visit【ToolNest】for the best tools and materials to get the job done right!

