How to Fix Loose Floorboards Yourself: Step-by-Step Guide
If you're dealing with loose floorboards in your home, you're not alone. As a homeowner, I know how frustrating it can be when a floorboard starts squeaking or shifting beneath your feet. But before you start thinking about hiring a professional or replacing your entire floor, I’m here to tell you that fixing loose floorboards yourself is a manageable task, and it can save you a lot of money. In this article, I'll walk you through how to fix loose floorboards yourself using simple tools and techniques. Whether you’re dealing with hardwood or laminate flooring, I’ll share everything you need to know.
1. Identifying the Problem
Before you get started on repairing the floorboard, it's essential to pinpoint the exact cause of the issue. Loose floorboards can happen for a number of reasons. Perhaps your house has settled over time, causing the boards to loosen. Or maybe moisture has caused the wood to warp and pull away from the subfloor. In my experience, the most common cause of loose floorboards is the nails or screws that were used to secure them originally becoming loose or corroded. When the nails or screws lose their grip, the floorboard shifts and starts to make noises or feel unstable.
1.1 Checking for Movement
Start by walking around the room and identifying which floorboards are loose. You’ll likely feel some give or movement underfoot. In some cases, the floorboards may squeak as you step on them. If a floorboard is visibly raised or has gaps around the edges, it’s an indication that it has become detached from the subfloor and needs repair. Keep in mind that it’s essential to fix the problem as soon as possible to prevent further damage or a tripping hazard.
1.2 Inspecting the Subfloor
Once you've identified the loose boards, lift them up carefully (if possible) and inspect the subfloor. If the subfloor is also damaged or warped, you may need to make additional repairs before reinstalling the floorboards. Sometimes, moisture damage or settling may affect the integrity of the subfloor. In my case, I had to replace a small section of subflooring before putting the boards back in place to ensure they were properly secured.
2. Tools and Materials You’ll Need
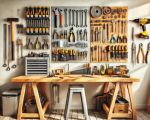
Before you begin the repair, make sure you have the necessary tools on hand. Most of the materials needed for fixing loose floorboards can be found in any typical toolbox. Here’s what you’ll need:
2.1 Tools
- Hammer or nail gun
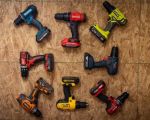
- Drill with appropriate drill bits
- Wood screws or nails
- Wood glue (optional)
- Wood filler or putty (for any gaps)
- Measuring tape
- Level (optional but useful)
- Safety goggles
- Work gloves
2.2 Materials
- Replacement nails or screws
- Floorboard adhesive (if needed)
- Wood filler (for gaps between boards)
Having these tools ready will make the process go smoothly. I recommend investing in a good drill and quality screws, as these will ensure the floorboards stay in place for a long time after the repair.
3. Step-by-Step Instructions
Now that you’ve gathered your materials and tools, it’s time to get to work. Follow these simple steps to fix the loose floorboards in your home.
3.1 Remove the Loose Floorboard
The first step is to carefully remove the loose floorboard. If it's raised or has gaps, gently pry it up using a crowbar or a flathead screwdriver. Take care not to damage the board if you plan to reuse it. If the board is severely warped or cracked, you may need to replace it. In my case, I was able to reuse the board by simply lifting it and carefully removing any nails or screws that had caused it to loosen.
3.2 Re-secure the Floorboard
Once the loose board is removed, you need to re-secure it to the subfloor. For this, I recommend using screws instead of nails for added strength. Drill pilot holes along the edges of the board and into the subfloor to avoid splitting the wood. Then, insert screws at regular intervals. If you’re working with a hardwood floor, you can also use wood glue to help secure the board before screwing it down. If there’s any visible gap between the board and the subfloor, fill it in with a high-quality wood filler to prevent dirt and debris from accumulating.
3.3 Check for Evenness
Once the board is secured, use a level to check for evenness. The board should be flush with the surrounding floorboards. If it’s still uneven, adjust it by loosening the screws slightly and repositioning the board until it’s level. Tighten the screws again to secure it in place. I always make sure to check this step carefully, as an uneven floorboard can cause issues later on.
3.4 Finishing Touches
If there are any visible gaps between the boards, you can use wood filler or putty to fill them in. This will give the floor a smoother, more polished look. Once the filler has dried, sand it down to ensure the surface is smooth and even. If you have laminate or engineered flooring, make sure the color matches so the repair blends seamlessly with the surrounding floor. In my case, after filling in any gaps, I applied a bit of touch-up stain to restore the original look.
4. Tips for Preventing Future Issues
Now that you’ve successfully repaired your loose floorboards, you’ll want to take steps to prevent this issue from happening again. Over time, natural settling and moisture can cause floorboards to loosen, so regular maintenance is key. Make sure to check your floors periodically for signs of damage, particularly in high-traffic areas. You can also use a dehumidifier in rooms with high moisture levels to help prevent warping. Additionally, if you notice any nails or screws starting to loosen again, address the issue promptly before it worsens.
5. When to Seek Professional Help
While fixing loose floorboards is a manageable DIY project, there are times when it’s best to consult a professional. If the subfloor is damaged or if you find that the issue is widespread across your home, it may be a sign of a more serious problem that requires professional attention. If you're unsure, it’s always a good idea to get a second opinion from a skilled contractor or flooring expert.
If you're looking for tools and more DIY tips for your home projects, check out ToolNest for recommendations on the best tools and equipment for your needs. Happy repairing!

