May 17, 2025
Why Raised Garden Beds Are a Game-Changer
As someone who loves gardening, I've learned that building raised garden beds can drastically improve the quality of my plants and make gardening much more enjoyable. Raised garden beds are elevated structures that help control soil quality, prevent pests, and reduce the amount of time spent on maintenance. They’re especially useful if you have limited space, poor soil quality, or want to create a visually appealing garden.
Not only do raised garden beds provide better drainage and root growth, but they also reduce back strain from bending down too much. But creating the perfect raised bed requires more than just good intentions; it requires the right tools.
Essential Tools for Building Raised Garden Beds
Building a raised garden bed is a project that requires several key tools. Whether you’re constructing a simple rectangular garden bed or something more elaborate, using the right tools will ensure that the process is efficient and your bed is durable. Here are the tools that I believe are crucial for any DIY raised garden bed project:
1. Shovel
The shovel is a gardening staple that’s indispensable when building raised garden beds. I use it to dig out the area where the bed will be placed, and sometimes to dig into the soil to remove weeds or debris. Having a sturdy shovel with a pointed tip is ideal for digging through tough soil.
2. Level
Once you've assembled the wooden frame for your raised bed, a level is a must to ensure the bed is perfectly horizontal. I use a long spirit level to check for evenness across all sides. This step is crucial because an uneven garden bed can lead to improper water drainage, resulting in plant health issues.
3. Measuring Tape and Square
I never skip measuring my garden bed before cutting the wood. A measuring tape helps me get the right dimensions for the garden bed, while a square ensures that the angles are precise. Both tools help ensure that the frame of the raised bed is symmetrical and sturdy.
4. Saw
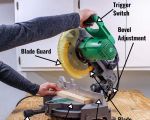
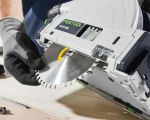
Whether you're using pressure-treated lumber, cedar, or any other material, a good saw is essential for cutting the wood to size. I prefer using a circular saw for faster cuts, but a hand saw works just as well for smaller jobs. Just make sure that your cuts are straight and clean to avoid gaps in the raised bed.
5. Drill and Screws
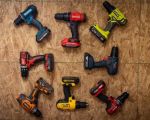
To secure the pieces of wood together, I use a power drill with wood screws. A drill makes the process quicker and more efficient, and the screws ensure the frame is tightly secured. You’ll want to drill pilot holes before screwing the pieces together to prevent the wood from splitting.
6. Wheelbarrow
Once the frame is built, it’s time to fill your raised garden bed with soil. A wheelbarrow is incredibly helpful for transporting soil, compost, and other materials without straining your back. It’s an essential tool for anyone looking to fill their raised bed without a mess.
7. Rake
After filling the bed with soil, I use a rake to level the surface and smooth the soil for planting. A rake also helps remove any debris left behind during the filling process, leaving the soil surface even and clean.
8. Landscaping Fabric (Optional)
Though it’s not necessary for every raised garden bed, I like to use landscaping fabric at the bottom of my beds to prevent weeds from growing through the soil. This layer helps keep the bed low-maintenance and ensures that only the plants I choose will thrive there.
Tips for Building a Raised Garden Bed
Having the right tools is only half the battle. Here are a few tips I’ve picked up over the years that can make the process even smoother:
1. Choose the Right Location
I’ve learned that location is everything. It’s essential to pick a spot that receives enough sunlight, typically 6-8 hours a day. The area should also be well-drained to prevent water from accumulating in the bed.
2. Use Quality Soil
The soil you fill your raised garden bed with directly affects your plants’ health. I recommend using a mix of high-quality compost, loamy soil, and organic matter for optimal plant growth. If you have a large bed, it’s worth investing in a bulk delivery of soil rather than buying bags.
3. Start with a Strong Frame
The frame of your raised bed should be sturdy enough to withstand the weight of the soil and the plants. Using rot-resistant wood like cedar or pressure-treated lumber is a great choice. If you’re unsure, a local garden supply store can help you pick out the best materials for your bed.
Where to Get the Best Tools for Raised Garden Beds
If you're new to gardening and building raised beds, it’s important to buy tools that are durable and efficient. Fortunately, there are many great options available, both in-store and online. Stores like Home Depot, Lowe’s, and local garden centers typically offer high-quality tools for reasonable prices. Additionally, you can check online stores like Amazon or ToolNest for specific tools like drills, saws, and rakes.
For those looking to invest in a premium set of tools, I highly recommend checking out ToolNest for the latest gardening equipment that will make the job easier and more enjoyable.
Conclusion
Building a raised garden bed doesn’t have to be a complicated process. With the right tools, some patience, and a little elbow grease, anyone can create a beautiful and productive garden space. I’ve found that the tools I use, such as a shovel, level, drill, and saw, are essential for getting the job done right. And with a bit of effort, the raised garden bed I create is sure to support healthy, thriving plants that I can enjoy for years to come.

