- What You Need to Install a Closet Shelf
- Measuring and Marking for the Shelf
- Drilling Holes and Installing the Brackets
- Attaching the Shelf
- Adjustments and Final Checks
- Tips for Organizing Your Closet with Shelves
What You Need to Install a Closet Shelf
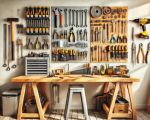
Installing a closet shelf with hand tools is a great DIY project that can significantly improve your closet’s organization and functionality. I’ve installed several shelves in my home closets, and I can assure you that with the right tools and some patience, you can achieve great results. For this project, you'll need a few essential hand tools, all of which are easy to find and affordable. Here's what you’ll need:
- Measuring Tape: Accurate measurements are crucial for ensuring the shelf is installed at the right height and level.
- Level: To make sure your shelf is straight and not tilted, a level is necessary.
- Drill: A drill is needed to create holes in the wall for your shelf brackets. You’ll also need the appropriate drill bits depending on the type of wall (wood, drywall, etc.).
- Screwdriver: A screwdriver will help you fasten screws into the brackets and shelf supports.
- Wall Anchors and Screws: These are necessary if you’re installing the shelf on drywall or hollow walls to ensure the shelf can hold weight securely.
- Bracket Supports: Depending on the shelf’s size and load, you may need heavy-duty brackets to hold the weight.
- Pencil: A pencil is needed for marking precise measurements on the wall where the brackets will be placed.
Measuring and Marking for the Shelf
The first step in installing a closet shelf is measuring and marking where you want the shelf to go. Start by deciding how high you want the shelf in your closet. Consider the items you plan to store and the amount of vertical space you need. For example, if you're storing sweaters, you’ll need a shelf higher up, while for shoes, a lower shelf works better.
Once you have decided on the height, use your measuring tape to mark where the shelf brackets will go. Be sure to use a level to draw a straight line across the area where the shelf will be installed. This ensures that your shelf will not be tilted or uneven. It’s essential to measure the distance between the two brackets so that the shelf is centered and supported evenly.
Drilling Holes and Installing the Brackets
After marking the spots for the brackets, it's time to drill the holes. Depending on the type of wall you’re working with, you may need to use wall anchors. If you're working with drywall, make sure to use the correct anchors that can hold the weight of the shelf and anything you’ll store on it.
To begin drilling, select the appropriate drill bit that matches the size of your screws. Be sure to drill straight into the wall and stop once you've drilled deep enough for the anchors. Insert the wall anchors if necessary, and then attach the brackets by aligning them with the drilled holes. Secure the brackets in place by using a screwdriver or drill to fasten screws into the anchors or studs, depending on your installation method.
Attaching the Shelf
Once the brackets are securely attached to the wall, it's time to place the shelf on top of the brackets. If you're using a wood shelf, make sure it fits snugly into the bracket supports. I prefer wooden shelves because they’re durable and customizable. However, if you’re using a metal or pre-made shelf, ensure it sits perfectly and that the brackets are aligned with the shelf’s edges.
After positioning the shelf on the brackets, secure it by using screws to fasten the shelf to the brackets. This step ensures that the shelf stays in place and can bear the weight of your items without shifting or tilting over time.
Adjustments and Final Checks
After the shelf is installed, it’s essential to do a final check to make sure everything is level and secure. Use the level once more to verify that the shelf is perfectly straight. If the shelf seems slightly off, adjust the brackets or screws as necessary to make it level. Take a moment to check the weight capacity of the brackets and ensure the shelf is securely fastened.
If you're satisfied with the shelf installation, it's time to clean up the area and start organizing your closet. Enjoy the extra storage and the sense of accomplishment from completing this DIY project!
Tips for Organizing Your Closet with Shelves
Once your shelf is installed, it’s time to get creative with organizing your closet. Here are some of my favorite tips to make the most out of your new shelf:
- Use Baskets or Boxes: To keep things neat and organized, use baskets or storage boxes to hold smaller items. This helps to maximize the use of vertical space and keep everything easily accessible.
- Label Everything: Labeling boxes or baskets can help you find things quickly and prevent clutter from accumulating on the shelves.
- Keep Heavier Items on Lower Shelves: For safety and stability, keep heavier items like shoes or storage bins on the lower shelves, while lighter items like clothing can be placed on higher shelves.
- Optimize Shelf Height: Don’t be afraid to add additional shelves if you have enough space. Adjustable shelves are perfect for adapting to changing storage needs over time.
Installing a closet shelf with hand tools may seem daunting at first, but with a bit of patience and the right approach, you can create a functional and organized space in no time. Remember, the key to a successful installation is proper measuring, using the right tools, and securing everything tightly. If you need high-quality tools for your next DIY project, check out ToolNest for top-notch products.

